Thursday, November 21, 2024
Step-by-Step DIY Pallet Shed: Quick and Easy Plans for Beginners

Step-by-Step DIY Pallet Shed: Quick and Easy Plans for Beginners
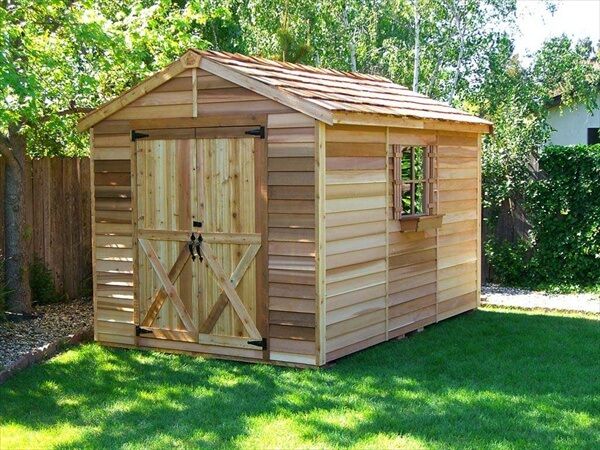
Constructing a shed can be a daunting task, often requiring extensive carpentry skills and significant financial investment. However, this comprehensive guide offers a simplified approach to building a functional and aesthetically pleasing shed using readily available reclaimed pallets. This project is designed for beginners, emphasizing ease of construction and minimizing the need for specialized tools or advanced techniques. The resulting structure, while not as robust as a professionally built shed, provides ample storage space for garden tools, equipment, or other outdoor necessities.
Phase 1: Planning and Preparation
Before commencing construction, meticulous planning is crucial for a successful outcome. This involves several key steps:
1.1 Site Selection and Assessment
The location of your pallet shed should be carefully considered. Choose a level, well-drained area that receives adequate sunlight but is also sheltered from prevailing winds. Consider proximity to electrical outlets if you plan to utilize power tools within the shed. Measure the intended area to ensure sufficient space for the shed’s footprint, allowing for adequate clearance around all sides for future access.
1.2 Pallet Sourcing and Inspection
Reclaimed pallets are the cornerstone of this project. Source pallets from reputable sources, ensuring they are free from rot, significant damage, or infestation. Inspect each pallet for loose boards, broken slats, or protruding nails. Discard any damaged pallets to ensure structural integrity. Aim for pallets of consistent size and quality for easier construction. You will likely require between 8 to 12 pallets, depending on the desired shed dimensions.
1.3 Material Gathering and Tool Preparation
Beyond the pallets, you will need additional materials. This includes:
- Concrete blocks or a suitable foundation: To raise the shed off the ground and prevent moisture damage.
- Wood screws (various lengths): For secure fastening of pallet components.
- Exterior-grade paint or sealant (optional): To protect the wood from weathering and enhance aesthetics.
- Roofing material (e.g., corrugated metal, plywood): To provide weather protection.
- Hinges and a latch/lock: For the shed door.
Necessary tools include:
- Hammer or mallet: For gently tapping components into place.
- Screwdriver (preferably cordless): For efficient screw driving.
- Measuring tape and level: For accurate measurements and ensuring a level structure.
- Circular saw or hand saw (optional): To cut pallets if necessary. Many pallets are pre-cut to standard sizes.
- Safety glasses and gloves: For personal protection.
Phase 2: Shed Construction
This phase details the assembly of the shed’s structure. Remember to prioritize safety throughout the process.
2.1 Foundation Construction
Create a sturdy foundation by positioning concrete blocks or a similar base in a rectangular pattern, matching the desired footprint of your shed. Ensure the blocks are level using a spirit level. This will provide a stable base and prevent uneven settling of the shed.
2.2 Base Frame Assembly
Using four intact pallets, create a rectangular base frame. Secure the pallets together using wood screws, ensuring strong connections at the corners. Carefully pre-drill pilot holes to prevent the wood from splitting. Check for squareness using a measuring tape or speed square at each corner.
2.3 Wall Construction
Attach additional pallets vertically to form the walls. Interlock the pallets securely by overlapping them slightly. Use screws to connect them to the base frame and to each other, creating a robust and stable structure. For added strength, consider using bracing between pallets to prevent racking.
2.4 Door Construction
Create the shed door using two or three pallets depending on the desired size. These pallets should be carefully attached using screws to form a single unit. Install hinges to attach the door to the assembled frame. Securely install a latch or lock to ensure the shed's contents remain protected.
2.5 Roof Construction
Construct the roof using additional pallets or sheets of plywood. The roof structure should provide sufficient overhang to protect the walls from rain. If using pallets, these can be laid at an angle to create a simple sloped roof. Secure the roof to the top of the walls using screws. For improved weather resistance, consider covering the roof with a suitable roofing material, such as corrugated metal or asphalt shingles.
Phase 3: Finishing Touches
Once the structure is complete, focus on finishing and protection.
3.1 Surface Treatment
Apply an exterior-grade paint or wood sealant to protect the pallets from weathering and enhance their appearance. Allow ample drying time between coats for optimal protection. Consider using a color that complements your existing landscape or garden design.
3.2 Additional Features (Optional)
To further enhance your pallet shed, consider adding features such as:
- Shelving: Constructed from additional pallets or repurposed materials.
- A small window: To improve ventilation and natural light.
- Weather stripping: Around the door for improved insulation and weather protection.
Conclusion
Building a DIY pallet shed is a rewarding project that combines practicality with affordability. By carefully following these steps, beginners can create a functional and attractive storage solution for their outdoor needs. Remember to always prioritize safety and take your time to ensure a sturdy and durable structure. With a little effort and planning, you can enjoy the satisfaction of creating a useful and aesthetically pleasing addition to your property.
Disclaimer: This guide provides general instructions. Always adapt these plans to your specific needs and available materials. Ensure all structural elements are securely fastened and meet local building codes where applicable. Seek professional advice if you have any doubts or concerns regarding structural integrity or safety.
No comments:
Post a Comment
Note: Only a member of this blog may post a comment.